Showing posts with label beef. Show all posts

Friday, April 6, 2012

Bibimbap Recipe

While it sounds like a song by the Hanson Brothers, it's actually a crazy delicious Korean dish that I had while visiting friends in Atlanta. Since it's something that I've only had once, I can't tell how spot on this recipe is, but we loved it. I pieced this together from several different bibimbap recipes, but it's most strongly influenced by this one. This nice thing about this recipe is that you can use whatever vegetables or meat that you have on hand. Our egg didn't turn out yolky, but that's because I gave poor instructions to Lo while he was cooking it.  Update: we made it again a few weeks later because I couldn't stop craving it.  This time the yolk turned out (on mine...his still broke, sadly), so I took a new picture because it's so pretty!

Bibimbap
4 servings


4 tablespoons soy sauce (gluten-free)
3 tablespoons sesame oil
3 teaspoons sugar
2 clove garlic, minced
1 teaspoon ginger, grated
1 pound thinly sliced chicken or beef
2 cup cooked rice (I used brown)
2-4 eggs
1 zucchini, halved lengthwise and thinly sliced
1-2 cups baby bella or crimini mushrooms, halved
1/2 - 1 cup carrots, matchstick or shredded (I buy shredded from Trader Joes)
handful of pepper slices (I used frozen) or other preferred veggies
Gochujang sauce (purchased or see below for "recipe")

Combine the soy sauce, 1.5 tablespoon of the sesame oil, sugar, garlic, and ginger in a large bowl. Add the meat and stir until coated. Set aside for 30 minutes - 2 hours. Cook rice according to package.

Heat 1/2 tablespoon of the sesame oil into a large skillet over medium heat. Add mushrooms and cook until they are tender. Set aside. Add another 1/2 tablespoon of the sesame oil to the skillet and add the sliced zucchini (and/or other vegetables). Cook until tender, about 5 minutes or so.

Set a large skillet over high heat (can remove vegetables and use same skillet). When very hot add the beef. Cook, stirring often until browned on all sides.

Pour the rest of the sesame oil into a non-stick skillet over medium heat. Crack the two eggs in and cook until the whites have set, but the yolk is still runny.

To assemble add rice to the bottom of the bowl, add the meat on top and place vegetables around the edge. Carefully place the egg on top. Serve with Gochujang sauce.  To eat, break the egg yolk and dig in.

Fake Gochujang Recipe
I call this fake because all gochujang recipes call for red pepper paste, which I didn't have, so I completely made it up.

Spoon and a half of garlic chili sauce
squirt of sriracha sauce
1/4 cup rice vinegar
1/4 cup water
1 tbsp (or less) sesame oil
1.5 tbsp brown sugar

Mix together all of the ingredients and reduce in a small saucepan until slightly thickened. Drizzle your preferred amount on top of the bibimbap.

Thursday, April 5, 2012

Easter 2011


For the last few years, we've stayed home on Easter. Traffic on Sunday night is so terrible (especially coming from my parent's in NE Ohio). The first year we did this, we went to Betty's for Easter lunch/dinner because they had adorable peep martinis.

Last year we went to Dirty Franks Hot Dog Palace for brunch because we'd been dying to try it (it was delicious!).  We made an awesome dinner later that night that wasn't exactly "Easter" standard - except for the carrots!

Hawaiian Teriyaki Burgers
Makes 4 burgers

1 pound ground sirloin
1/2 cup red onions, finely chopped
1 egg, slightly beaten
1/3 cup Bread Crumbs or Crushed Tortilla Chips (use chips for gluten-free)
1 teaspoon garlic, minced
1/4 teaspoon ground black pepper
3/4 teaspoon chipotle spice rub (use your favorite)
1 1/2 Tablespoons spicy brown mustard
3 tablespoons Spicy Hawaiian Marinade (from World Market) or Hawaiian Teriyaki Sauce (or choice of sauce)
vegetable oil, for brushing the grill rack
4 hamburger buns or sandwich thins (or nothing if gluten-free)
6 fresh pineapple rings, thinly sliced
3 tablespoons fresh cilantro, chopped

Preheat a gas grill to medium-high. Combine the sirloin, onion, egg, bread crumbs, garlic, pepper, spice rub, mustard, and sauce in a large bowl. Mix until combined. Divide mixture into 4 equal portions and form patties, slightly larger than bun size.

When grill is ready, brush grill rack with oil. Place patties on rack, cover, and cook, turning once, until done (165‘F), about 7 minutes on each side. Grill pineapple rings after turning burgers, about 2 to 3 minutes on each side. During the last few minutes of cooking, place buns, cut side down, on outer edges of rack to toast lightly.

To assemble burgers, on each roll bottom, place a burger and a grilled pineapple ring. Brush bun tops with sauce, sprinkle with ½ tbsp of cilantro and serve.

Fingerling Potatoes Braised with Pepper and Paprika
Adapted from Fat Free Vegan Kitchen

olive oil spray
½ cup minced red onion
3 cloves garlic, minced
1 tablespoon tomato paste
1 ½ teaspoon smoked paprika
1 teaspoon pepper
½ teaspoon cayenne pepper
1 1/2 pounds fingerling potatoes or small red potatoes
2 ½ cups vegetable broth
1/2 teaspoon salt
2 teaspoons corn starch
½ cup cold water
1 tablespoon fresh oregano leaves (optional)

Wash the potatoes and cut potatoes in half, except smaller or thin potatoes, which can be left whole.
Spray a pan lightly with olive oil. Over medium-high heat, sauté the red onion for about 3 minutes. Add the garlic and cook for another minute. Add the tomato paste, spices, and potatoes and toss to coat. Stir in the vegetable broth, add salt to taste, and cover. Cook on low for about 25 – 30 minutes, until potatoes are tender. Remove the cover and increase the heat. Cook, stirring regularly, until the broth has cooked down to about half. Remove the potatoes to a serving bowl with a slotted spoon. Stir corn starch into the cold water until smooth and add to the sauce. Stir and continue cooking until thickened to desired level. Add the oregano and pour over the potatoes to coat with sauce.

Grilled Carrots with Carrot Greens Pesto(makes 4 servings)

1 bunch carrots with greens attached
1 large clove garlic
about 1/2 cup and 1-2 tablespoons good extra-virgin olive oil
salt and pepper to taste
1/2 cup pine nuts (optional)
1/4 cup parmesean cheese or parm-romano blend
Favorite spices – I used a chipotle blend, to taste

Snip the carrots from the greens leaving about 1/2-1 inch of the stem on the root. Set carrots aside. Remove any long stems and wilted leaves from the leafy greens. Bring a pot of salted water to a boil and boil the greens for about 1 minute. Drain for 5 minutes. Coarsely chop the garlic clove and the greens, and transfer to a food processor as well as salt, pepper, the 1/2 cup of olive oil and pine nuts and cheese. Pulse for a few seconds, stopping to scrape down mixture with a spatula as needed, until well blended. Taste for seasoning, adding salt and pepper and other spices, as desired.
Cut carrots lengthwise so that they’re about equal in size and thickness. Drizzle with olive oil just to coat and season with salt and pepper. Grill carrots on a grill heated to medium-high (or cook on cast-ron pan on stovetop). Let cook for 1-2 minutes, or until charred marks form on the underside, and flip. Cook another 2-3 minutes, turning occasionally, until each side is slightly charred and remove from heat. Serve with the pesto.

And of course, we had Easter Banana Peanut Butter Cupcakes!

Wednesday, March 28, 2012

Corned Beef and Coleslaw

I was busy lazy before St. Patrick's Day weekend, so didn't get the corned beef made until the next week.  I didn't know that I liked corned beef until we went to Skillet and I had corned beef hash.  I didn't even know what it was, but it sounded pretty gross.  What is "corned" anyway?  So once I knew I liked it, I decided to buy it when it was on sale for $3.99/lb. before St. Patty's.  I also bought a bunch of cabbage for a couple of different recipes and used the last half a head in this coleslaw recipe.  We don't generally love coleslaw, but this recipe looked good and I thought it would go well with the beef.  The original recipe also had a Guinness dipping sauce that sounded AMAZING, but I can't have beer because of gluten.

Corned Beef and Coleslaw
inspired by this recipe 
 2-2 1/2 pound corned beef brisket
corn tortillas

Coleslaw:
3 cups thinly sliced green and/or purple cabbage
1 tablespoon finely chopped red onion
1 tablespoon finely chopped chipotle pepper (in adobo sauce)
1/4 cup mayonnaise
2 tablespoons plain Greek yogurt
1 1/2 tablespoons spicy brown mustard
1/2 tablespoons cider vinegar
salt and pepper, to taste

For corned beef:
Place corned beef, fatty side up, in a slow cooker and sprinkle seasoning packet on top. Add 1/2 cup of water to the crockpot.  Set on low and cook for 10 hours.  Remove corned beef from water and let sit at about 10 minutes, until cool enough to handle. Scrape off the gross fat layer and discard. Shred remaining meat.  If you have a husband, make him do this part.  It's gross.

For coleslaw:
Mix together cabbage, red onion and jalapeno in a large bowl.
In another bowl, combine mayonnaise, yogurt, mustard, vinegar, salt and pepper.  Pour over cabbage mixture and toss until combined.

I didn't have any good pics, but I one during lunch the next day and dinner the next night, which is why they aren't in a tortilla. 

Thursday, March 8, 2012

Reduced-Fat Sloppy Joes


Reduced-Fat Sloppy Joes
Photo credit

We loved these sloppy joes - the sauce was really good and they were much healthier since mushrooms were added, thus decreasing the beef in each serving.  I'm being completely honest when I say that you have no idea there are mushrooms in this recipe.  As a matter of fact, I just asked Lo if he knew there were mushrooms in it and he had no idea. 

Reduced-Fat Sloppy Joes
inspired by Cook's Country Recipe

  • 2 teaspoons vegetable oil
  • 6 ounces white mushrooms, sliced thin
  • 1 teaspoon brown sugar
  • 1 tablespoon Worcestershire sauce
  • 1 small onion, minced
  • 1 (8-ounce) can tomato sauce
  • 1/3 cup ketchup
  • 1 1/4 teaspoons chili powder
  • 1 teaspoon red pepper flakes or some sriracha sauce to taste
  • 1 teaspoon cider vinegar
  • 1/3 cup water
  • 1 lb. 93 percent lean ground beef
  •   Salt and pepper
  • 4 hamburger buns 
1. Process Mushrooms Heat 1 teaspoon oil over medium-high heat in large nonstick skillet. Add mushrooms and cook until browned, about 5 minutes. Transfer to food processor and pulse until mushrooms are finely ground.  

2. Make Sauce Heat remaining oil in empty skillet over medium heat until shimmering. Cook onion and processed mushrooms, covered, stirring occasionally, until tender, 8 to 12 minutes. Stir in chili powder and cook until fragrant, about 30 seconds. Add tomato sauce, ketchup, Worcestershire, red pepper flakes or sriracha, sugar, vinegar, and water. Simmer over medium-low heat until vegetables are tender and sauce is slightly thickened, about 15 minutes.  

3. Simmer Beef Add beef and simmer, breaking up meat with wooden spoon, until no longer pink, about 5 minutes more. Season with salt and pepper. Serve.

Sunday, February 19, 2012

Beef, Pork, Beef?

When looking through my freezer a week or two ago, I came upon a gallon Ziploc bag with a roast in it.  It was once labeled with masking tape, but the tape had fallen off (masking tape isn’t good on plastic bags in the freezer).  The roast looked like it was getting a little icy inside the bag, as if it wasn’t sealed well or the air wasn’t removed before freezing, so I wanted to use it up in the next few weeks.  I have a vague memory of when we froze a couple of batches of meat, and we had clearly rubbed it with some sort of meat rub before we froze it.

The one little problem was that I had no idea whether it was a pork roast or a beef roast- as we’d frozen batches of both at different times.  Initially I thought it was beef, recalling the memory of packaging/rubbing it with seasoning (more accurately, making Lo do that).  I also had some packages of gravy that I wanted to use (a GF one and non-GF one), so I thought I’d make a roast this week.  I had him throw it in the crockpot when he got home from work to get it started.   When I got home and looked in the crock, I had doubts that it was beef, but it was really hard to tell because it was still mostly frozen and was covered in a rub.  Lo thought it looked more like pork too. I was a little disappointed, because I was hoping for beef.  Since we’ve recently had (and still have frozen) pulled pork, I decided we’d still make a roast of it.  I asked Lo if he thought it was weird if we used beef gravy on pork roast (if that’s what it turned out to be) and he said no – which is good, because I really wanted to use up the gravy!  I cut up some potatoes, carrots, and celery and threw them in the crock.  I also drizzled some hot sauce and Spicy A1 on top (because I’m trying to use up some condiments).  I sliced a container of white mushrooms to caramelize in the skillet before adding to the crock by adding some concentrated beef stock crystals to the water in the skillet so they’d get a really beefy flavor.  Once all of the liquid from the pan had been cooked off, I deglazed the pan with a little more water and poured the mushrooms and juice into the crockpot. 

Lo went to crossfit, so I left a note telling him to check the temp on the pork when he got home and if it was done, he could eat it with some of the gluten-containing gravy.  I had a 9:10 volleyball game, so I wouldn’t be home until after 10.  When I got home I asked him if it was pork and whether he liked it.  He said it was, and he did, but it wasn’t as tender as he expected.  At first I thought it was just because I cooked it on high instead of low – but once I thought about it, I realized that the only pork we had in the freezer was tenderloin, so it should have cooked tender no matter what.  As we were transferring the rest of the roast and veggies into a glass container, I decided it looked more like beef and asked him if he was sure that it was pork.  He didn’t really know because he ate it with beef gravy, but now that he was looking at it, it looked like beef.  Finally I just tasted some and it was, in fact, beef.  I had it for lunch the next day and it was quite good!  It had a spicy taste to it, which could be from the condiments I added to the crock – or from the initial rub.  Since I don’t know what it was rubbed with, I guess we’ll never know. 

Moral of the story – mark your meat.  More specifically, write in marker on the bag instead of tape - unless you have freezer tape. 

Friday, February 10, 2012

Breakfast Chili Potato Hash

When I organized the pantry I found a can of turkey chili that was nearing the sell-by date so I set it on the counter to remember to use it.  After a few weeks, something made me think of breakfast hash (I think I had something like that at Tip Top before and loved it), and I went in search of a recipe for a hash with chili.  I found this Rachael Ray recipe, and made a few changes.  Lo made it on Sunday and while it was good, it would definitely be better with some additions (which I included in the recipe).

Breakfast Chili Potato Hash

  • 1-2 tablespoons extra-virgin olive oil
  • 2 large potatoes, poked with a fork then cooked in the microwave for 6-8 minutes on high, or until tender (I used redskin potatoes)
  • Salt and freshly ground black pepper
  • 1-2 bell peppers, finely chopped
  • 1 medium size onion, finely chopped
  • 1-2 cups leftover chili (I used a can of turkey chili)
  • Hot sauce to taste, depending on chili
  • 1-2 tablespoons butter or oil
  • 4 extra-large eggs
  • 1/4 cup of shredded cheese
Heat a large nonstick skillet over medium-high heat with 2 turns of the pan of EVOO, about 2 tablespoons. While the skillet heats up, chop up the cooked potatoes into bite-size chunks then add to the hot skillet and spread out in an even layer. Season them with a little salt and pepper, and let them brown for about 2 minutes without messing with them. Then give them a stir and continue to brown them for another 3-4 minutes, stirring every now and then.

Add the chopped pepper and onions, stir to combine and continue to cook for 4-5 minutes or until the veggies are tender. Add the leftover chili and hot sauce; cook until it is heated through.

While the leftover chili is heating up with the potatoes, start the eggs: Preheat another skillet over medium-high heat with butter or oil. Once the skillet is hot, crack eggs into the pan, season with salt and pepper, and fry to desired doneness.

Divide the chili hash between 4 serving plates and top with the fried egg.  Sprinkle cheese on top.

Tuesday, February 7, 2012

Cajun Cabbage and Beef

Cajun Cabbage Recipe
adapted from Taste of Home
Cajun Cabbage Recipe
  • 1 pound ground beef
  • 1 medium red pepper, chopped
  • 1 medium onion, chopped
  • 2 garlic cloves, minced
  • 1 can diced tomatoes and green chilies
  • 1 can (8 ounces) tomato sauce
  • 1/2 cup uncooked brown rice
  • 1 teaspoon salt
  • 1/2 teaspoon dried basil
  • 1/2 teaspoon dried oregano
  • 1/4 to 1/2 teaspoon each white, black and cayenne pepper
  • 4 to 6 drops hot pepper sauce or sriracha
  • shake of cajun seasoning
  • 1 small head cabbage, chopped
  • 1 cup shredded Colby cheese
In a skillet, cook the beef, green pepper, onion and garlic over medium heat until meat is no longer pink; drain. Stir in tomatoes, tomato sauce, rice and seasonings. Spread into an ungreased 13-in. x 9-in. baking dish. Top with the cabbage and cheese. Cover and bake at 350° for 65-75 minutes or until the rice is tender. Serves 8.

Filling mix


After baking
Before baking


Monday, January 30, 2012

Mexican Stuffed Portobellos

Mexican Stuffed Portobellos
Since we've started eating mushrooms, I usually order portobello mushrooms when I get a Green Bean Produce Delivery.  I made these last year - it was just a throw together meal of whatever ingredients we had - and we really liked it so I wanted to try it again.  As usual, I don't really measure things, but there is little room to mess anything up.  The filled made more than we needed for these, so I froze the rest for us to use for tacos or whatever some other night.  I highly recommend that everyone get a cast-iron pan (10-12 inches).  Amazon has pre-seasoned Lodge Cast Iron (made in USA) for really good prices ($18 and $21), and locally World Market usually has them as well.  These pans will literally last forever if you take care of them - it's easier than you think (see below for our care instructions).

Mexican Stuffed Portobellos

4 portobello mushrooms, wipe any dirt off the outside and scrape out gills with a spoon
1 lb. lean ground beef (or turkey)
1/2 bunch of kale
1/3 bag of frozen corn
1/2 jar of salsa
handful of fresh spinach
2 green onions, chopped
onion flakes or chopped onion
taco seasoning or fajita seasoning
splash of Braggs Liquid Amino Acid (can use soy sauce or leave out completely)
red pepper flakes, to taste, optional
shredded cheese of your choice, for topping
avocado for topping, cubed
Half of a lime

Clean/prepare your mushrooms.  Add beef (and onion if using a real one) to a large skillet (preferably ovenproof) and cook until beef is just done, stirring every minute or so.  While meat is cooking, chop all veggies.  Drain beef in a metal colander if there's a lot of grease.  Return beef to skillet and add taco/fajita seasoning mix, dried onion, red pepper flakes, and 1/4 cup of water. Stir well.  Add corn, kale, spinach, green onions, and any other veggies you want.  Add salsa and a splash of Braggs or soy sauce if using.  Put lid on skillet and cook until kale is wilted (stirring occasionally), 5-7 minutes.  If the mixture looks dry at any point, add a few tablespoons of water. 

Post-broil
If you have a second oven-proof skillet, arrange portobellos in the second skillet.  If you don't have a second skillet, transfer filling to a bowl and scrape out skillet (no need to wash) and arrange mushrooms in the pan.  Add about 2 tablespoons of water to the pan around the mushrooms.  Mound filling into each mushroom and sprinkle with cheese.  Cover skillet and allow to cook for 5-7 minutes until mushrooms look tender.  If you have an oven-proof skillet, turn on broiler and place skillet under the broiler for a few minutes (watching carefully) until cheese is browned. Squeeze a half of a lime over the mushrooms and carefully transfer to plates.  Top with avocado. 


Mexican Stuffed Portobellos


 I have a 10.25 inch cast iron pan that my mom gave me - I think she said it belonged to one of my grandmas and I remember cooking with it all of my life at home - so it's pretty old, but it is smooth as a baby's bottom on the inside.  We also have a 12 inch one that I got from Amazon.  We recently bought lids for them (also at Amazon, $20 and $25), which I highly recommend.  If you want to be really careful about seasoning and caring for your cast iron, read these "real" instructions of proper care.  We basically wash with hot water, no soap, oil it on the inside, and put it on the stovetop and turn on the burner for a few minutes to help it dry.  You could also wipe off any water before oiling lightly.  My oiling/drying, you'll help prevent rusting and help keep it "seasoned".  You should also re-season it every now and then, which entails oiling it really well and baking it in the oven for an hour.  We also have this Lodge handle mitt, that makes it easy to pick up and transfer to and from the oven, as the handle gets really hot even when cooking on the stovetop.  And don't worry - if you accidentally use soap every now and then, it should be fine.  When I lived at home, I didn't know you couldn't use soap on them, so I'm sure that the older one that we have was soaped plenty of times and rarely re-seasoned.  It's fine, but I would recommend caring for them properly so they will last forever. 

Tuesday, January 17, 2012

Grilled Pizza Nights!

Lo's Pepperoni and Sausage Pizza
Lo's favorite food is pizza, specifically Adriatico's, but even when I was eating gluten, it always gave me more heartburn/stomach pain than other pizzas, so we didn't get it very often.  A few years ago, we started grilling pizzas and have never turned back.  Rain or shine, balls hot or winter, when we make pizza, it's almost always on the grill.  It always shocks me when people don't realize you can put pizza dough on the grill.

As for the dough - we used to often use Trader Joe's Dough, either whole wheat or garlic/herb (sold in a ball shape near the hummus in the refrig section for about $1.19), but at some point we stopped getting it very often even before I was GF.  Now we usually use Pillsbury Pizza Dough Roll (with the biscuits in refrig section) for him, and either Chebe GF Pizza Dough Mix ($19.86 for 8 mixes w/subscribe and save) or Bob's Red Mill Pizza Dough Mix ($10.95 for 4 mixes w/subscribe and save) for me.  Both of those gluten-free crusts bake up nicely and have a chewy crust instead of the crispy, crackery standard GF crust.  Note: the Chebe requires a cup of shredded cheese IN the mix, so just know that you'll need/be eating more cheese than just for the topping.  We don't need to make two separate pizzas - he likes the GF crust, but we usually want to use different toppings, so it's easier to keep a couple of Pillsbury doughs in the fridge for him - he likes the taste and you just have to roll them out and they're ready.  Plus then we have pizza leftovers, which are ALWAYS good.

GF Chicken Huli Huli Pizza with
carrots, spinach, and pineapple
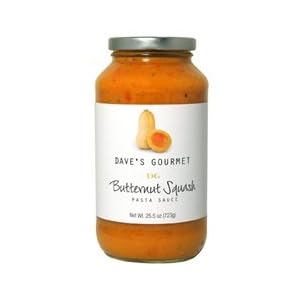
His pizza usually consists of Trader Joe's Pizza Sauce, pepperoni (actually secret pepperoni because I have to hide it from him and then try to find it when we want to make pizza), sometimes crumbled sausage, and mozzarella, with some Trader Joe's Shaved Parmesan, Romano & Asiago Cheese Blend - oh, and a heavy dose of red pepper flakes.  My pizza varies greatly - the last three have been: Butternut squash sauce (I get at Costco), kale, balsamic onions, sundried tomatoes, goat cheese, and mozzarella; Lemon and Artichoke Sauce, sundried tomatoes, goat cheese, and mozzarella; and the last one was Homemade Huli Huli Sauce (leftover), shredded chicken, roasted garlic, shredded carrots, spinach, mozzarella, and the Trader Joe's parm blend.  I threw a few sausage crumbles on top because he had extra.  I built the toppings around adding pineapple to the pizza, but completely forgot, so I ate it with pineapple on top.  

GF Butternut Squash Sauce with Kale, Balsamic Onions,
Sun-dried Tomatoes, Goat Cheese, and Mozzarella


As far as grilling the pizza - it's simple.  Just prepare the dough per instructions and roll it out as usual. You want to make sure to roll out the pizzas small enough so they fit on the grill (we don't worry about the shape).  It's easiest to use a pizza peel (here's one for $15) or a rimless cookie sheet) to roll out the dough, and use cornmeal to keep it from sticking (flour works, but I can't use it).  If you don't have a rimless cookie sheet, flip a rimmed cookie sheet upside down and use the bottom.  It's a little easier to work with smaller sized pizzas, so you may want to only make them 6-7 inches to start until you get used to it.  Oil the grill grates and heat to medium (we have a gas grill). When the grill is hot, carefully slide the pizza from the peel or cookie sheet onto the grill.  It should only take 3-5 minutes to bake the first side of the crust - just check it every now and then by lifting the edge with a metal spatula, until it's golden brown (be aware of hot spots on your grill so the dough isn't blackened).  Using a big spatula, flip the pizza onto the peel or cookie sheet with the grilled side UP.  Turn the heat to low and take the pizza inside and add your toppings to the already grilled side.  Slide the pizza back onto the grill to cook the bottom side and close the lid.  By turning the heat to low, you'll be able to leave it on long enough so that the cheese melts and the toppings are heated.  Once again just lift the edges to check for doneness (a lot of grills are hotter in the middle, so you may want to pull it off before the edges are completely browned).  When done, slide back on the peel or cookie sheet and allow to cool slightly before cutting!  Unless you have a big grill or are making 2 small pizzas, you will probably have to make one at a time.   
GF NYE Pizza with Lemon and Artichoke Sauce,
Goat Cheese, and Sun-dried Tomatoes

You'll never go back.  Full disclosure - Lo always makes the pizzas, I just add my topping.  I think we made the first couple together while we were figuring out how to grill pizza, but since then, he's the pizza master.